
ENGINE SYSTEMS
Start With the Part of the Engine You Are Servicing
The old page was only six thumbnails. The same W-BodyTech images are retained, but each section now explains where it fits in an actual repair or overhaul.
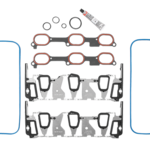
SEALING
Gaskets & Seals
Head gaskets, intake gaskets, valve-cover gaskets, timing-cover seals, oil-pan seals and the surface preparation needed for a reliable repair.
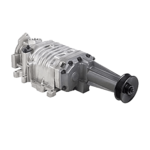
L67 / L32
Supercharger
Eaton M90 coupler, bearings, snout oil, rotor condition, Gen III/Gen V differences and the sealing surfaces involved when servicing a supercharged 3800.
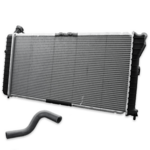
THERMAL CONTROL
Cooling System
Radiator, thermostat, water pump, fans, coolant passages, air bleeding and the cooling faults that should be repaired before a rebuilt engine is put back into service.
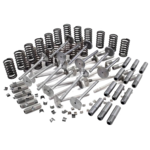
VALVE MOTION
Valvetrain
Lifters, pushrods, rockers, springs, retainers, valves, guides and the checks required before reusing or upgrading valvetrain components.
TOP END
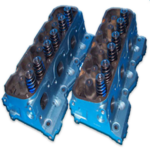
Cylinder Heads
Flatness, cracks, valve seats, guides, spring condition, deck surface finish and head-fastener procedures. Machine-shop inspection should precede parts ordering.
BOTTOM END
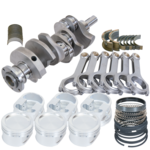
Rotating Assembly
Crankshaft, rods, pistons, rings, bearings, cylinder condition, oil clearances and the measurements that determine whether standard or undersize/oversize parts are required.
W-BODY ENGINE FAMILIES
There Is No Single W-Body Rebuild Specification
W-Body production spans nearly three decades and several unrelated engine architectures. Bearing clearances, torque procedures, gasket design, timing systems and machine-work limits must come from the exact engine’s service information.
Early W-Bodies used several four-cylinder families with different block, head and timing designs. Identify the exact engine before ordering internal parts or using torque specifications.
These engines share family history but not one universal top-end, timing or fastener procedure. Later 3500/3900 engines also add significant design changes compared with early 2.8/3.1 engines.
Cast-iron block and heads, OHV valvetrain and a long W-Body service history make the 3800 a common rebuild platform. Supercharged engines add M90 service and additional heat/cylinder-pressure considerations.
Later 3.6L engines use dual overhead cams, variable valve timing and timing-chain systems. Rebuild and timing procedures are substantially different from pushrod W-Body engines.
The LS4 uses a transverse W-Body-specific package with aluminum cylinder heads, Active Fuel Management hardware and its own front-accessory/oiling considerations. Do not substitute generic longitudinal LS service assumptions.
OVERHAUL PLANNING
A Better Engine-Rebuild Workflow
Good rebuilds are measurement-driven. The sequence below prevents the common mistake of buying pistons, bearings or gaskets before the block, crank and heads have been inspected.
Confirm the engine actually needs internal work.
Before teardown, document oil pressure, compression, leak-down results, coolant/oil contamination, noises, misfires and scan data when possible. A failed intake gasket, ignition system or external oil leak can mimic a worn engine.
Record exactly what is being rebuilt.
Save the VIN, RPO/SPID data, engine code, casting numbers and any visible part numbers. Photograph hose routing, brackets, grounds, harness routing and timing marks before disassembly.
Disassemble methodically.
Keep caps, rods, lifters, pushrods, followers and other location-sensitive components organized by original position. Inspect the oil filter and pan for metal before cleaning removes evidence of the failure.
Inspect before ordering hard parts.
- Cylinder bore diameter, taper and out-of-round.
- Crankshaft journal diameter, taper and surface condition.
- Main and rod bearing oil clearance.
- Piston-to-wall clearance and ring-land condition.
- Deck and cylinder-head flatness.
- Valve stems, guides, seats, springs and sealing surfaces.
Let measurements determine the machining.
Honing, boring, crank grinding/polishing, decking, head resurfacing and valve work should be based on measured condition and the replacement parts being used. Surface finish must also match the gasket technology being installed.
Verify clearances before final assembly.
Check bearing clearance, ring end gap, crankshaft endplay, piston/deck relationship and any performance-specific piston-to-valve or spring/retainer clearance before sealing the engine.
Use the exact torque sequence and lubricant specification.
Clean threads and bolt holes, use the specified assembly lubricant/sealer and follow the engine-specific torque plus angle procedure. Do not substitute a generic internet torque value for factory/service information.
Protect the engine before its first firing.
Prime the oiling system as appropriate for the engine, verify oil pressure immediately, bleed the cooling system correctly and inspect for leaks. Cam/lifter break-in requirements depend on the valvetrain and parts used, so follow the component manufacturer’s procedure.
CRITICAL ASSEMBLY PRACTICES
Details That Decide Whether a Rebuild Lives
FASTENERS
Torque-to-Yield Bolts
Many engines use torque-plus-angle or torque-to-yield fasteners in critical joints. Fel-Pro recommends replacing TTY head bolts rather than reusing stretched fasteners.
Threads and bolt holes must be clean. Use oil or thread sealer only where the exact service procedure calls for it.
SEALING SURFACES
Surface Finish Matters
A flat surface can still be too rough or too smooth for the gasket being used. Head and block surface finish should match the gasket manufacturer’s requirement, especially with MLS-style gaskets.
Never use aggressive abrasive discs that remove metal or leave abrasive material in the engine.
CLEANLINESS
Clean Is an Engine Specification
Oil passages, ring lands, bolt holes, bearing saddles and machined surfaces must be completely clean before assembly. Residual honing grit or machining debris can destroy new bearings quickly.
BEARINGS
Measure Oil Clearance
Bearing shell markings do not prove the finished clearance. Measure the crank journals and verify installed oil clearance using proper measuring tools and/or the method specified by the service information.
PISTON RINGS
Set Ring Gap for the Build
Ring end gap depends on bore size, ring manufacturer, piston design, intended use and cylinder temperature. Forced-induction and high-output engines may require different gaps than a stock rebuild.
CYLINDER PRESSURE
Detonation Can Undo the Rebuild
Excessive boost, inadequate octane, lean fueling, excessive timing or uncontrolled knock can lift heads and damage pistons or bearings. A fresh performance engine still needs a correct calibration.
Do not publish or use one “W-Body engine torque chart” for all engines. Even within one engine family, fastener design and torque procedures can change by generation and model year. Always attach a specification to an exact engine/RPO and source.
REBUILD OR REPLACE?
Choose the Repair Strategy Before Spending Money
For older W-Bodies, the best answer is not automatically a complete overhaul. Availability of good used engines, machine-shop cost, performance goals and the condition of the original block all matter.
REPAIR
Top-End or Localized Repair
Best when the short block measures well and the failure is limited to heads, gaskets, valvetrain, timing components or external sealing.
REBUILD
Machine & Reassemble
Best when preserving the original engine matters, the block/crank are usable, or the build needs specific clearances and internal parts for a performance target.
REPLACE
Known-Good Long Block
Can be the most practical path for a stock daily driver when a compatible good engine is available. Verify engine code, sensors, reluctor/timing compatibility and accessory differences before purchase.
W-BODYTECH COMMUNITY
Working on a Specific Engine?
Use the exact engine family reference and forums before ordering machine work or internal components. A 3800, 3400, 3.6L and LS4 may all live in W-Bodies, but their overhaul procedures are completely different.